Last updated on 2026-03-30, by
How to Record Any Streaming Video on Mac Safely?
What This Guide Covers
- This article will show Mac users how to safely record streaming videos. We’ll cover built-in options, powerful software like OBS, and even how to handle DRM-protected content using CleverGet Recorder.
Ever wished you could save that favorite movie, online lecture, or tutorial from a streaming site before it disappears? Mac users often run into this problem sometimes for work, study, or just personal convenience. The idea of recording streaming videos sounds simple, but in reality, it comes with a few hurdles: platform restrictions, potential quality loss, and the risk of using unsafe tools. In this article, I will share how you can record any streaming video on a Mac. We will share different methods that you can use that work best for you.
Quick AccessCLOSE
How to Record a Live Stream on Mac with Built-in Tools
In many situations, you do not require the use of external applications for capturing live streams on your Mac, as macOS has built-in solutions for doing so, and these built-in solutions do not cost anything and are generally able to do the job as a starting point. There are two main options below:
1. Screenshot Toolbar (macOS Mojave and Later)
If the macOS version of your Mac is Mojave (10.14) or later, you can try the Screenshot Toolbar to record streaming video. It is one of the most accessible methods to record streaming video; you can take screenshots and screen recordings on your Mac without having to install anything else.
Step 1: To open the screenshot toolbar, press Shift+Command+5.
Step 2: You can select two recording options, "record the entire screen" and "record the selected portion and if you select to record the selected portion, it will only capture the area where the video player is after the screenshot toolbar appears.

Step 3: Once the selected area is chosen, you can now resize/move your recording frame. Once you are done with the sizing and positioning of your recording frame, you can start recording your live stream. To start the recording, click on the "Record" button. Once done with recording, click on the "Stop" button (located at the menu bar) to stop your recording.
Step 4: The file will be saved as a .mov file, typically on your desktop. You can use iMovie or QuickTime to trim/edit it later.
2. QuickTime Player
QuickTime Player has been part of macOS. It provides slightly more options to control your recording than does the Screenshot Toolbar. Here are steps to record with QuickTime Player:
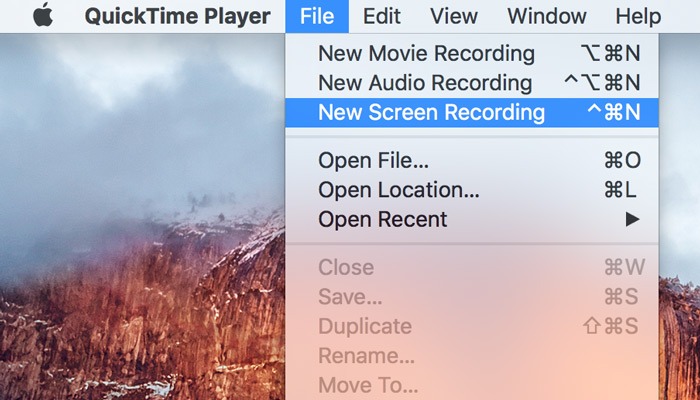
Step 1: Open QuickTime Player from your Applications folder
Step 2: Go to File > New Screen Recording.
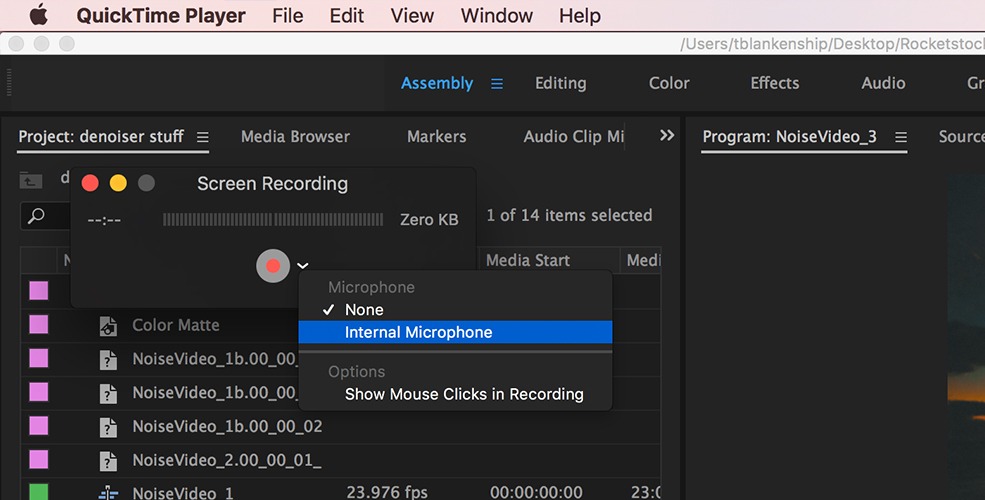
Step 3: In this little window that pops up you need to click the drop-down arrow in order to select your microphone if you want to record voice over or other external audio. In order to record system audio from your stream you will need an additional tool like black hole or sound flower.
Step 4: Click the red record button, then select either record all of the screen or just part of it by dragging your cursor around the portion you would like to record when you click the record button.
Step 5: While recording, play your live stream so you have video to record.
Step 6: Once finished recording, simply press the stop button located in the top menu.
Step 7: Name your recorded video and save it in .mov file format. After saving, you also have the option to trim (cut) and edit your recorded video with QuickTime.
How to Record High?Performance Streams on Mac with OBS
To record a high-performance stream on a Mac, you need to use another application called OBS Studio. Built-in recording applications normally have difficulty recording large or high-quality streams. OBS Studio is a free and open-source recording application used by many Streamers and Creators for their recording needs.
Step 1: Download OBS from its official website and installing it is the first step in order to use it on your PC. During installation, a prompt will appear requesting permission to access the screen to record it along with mic access as well.
Step 2: Start OBS once it has been installed, then find the Output tab under Recording. Select either MP4 or MOV as the file format to save your recording. Select High Quality as the recording quality and enable hardware acceleration if you have the option on your Mac.
Step 3: To show your screen just click on the plus icon (or click on Create New) in the Sources panel in the Stream section of the main screen, then select Display Capture to display your entire computer screen or Window Capture if you only want to display one particular browser window or player. You can also give the source you created a name and resize it.
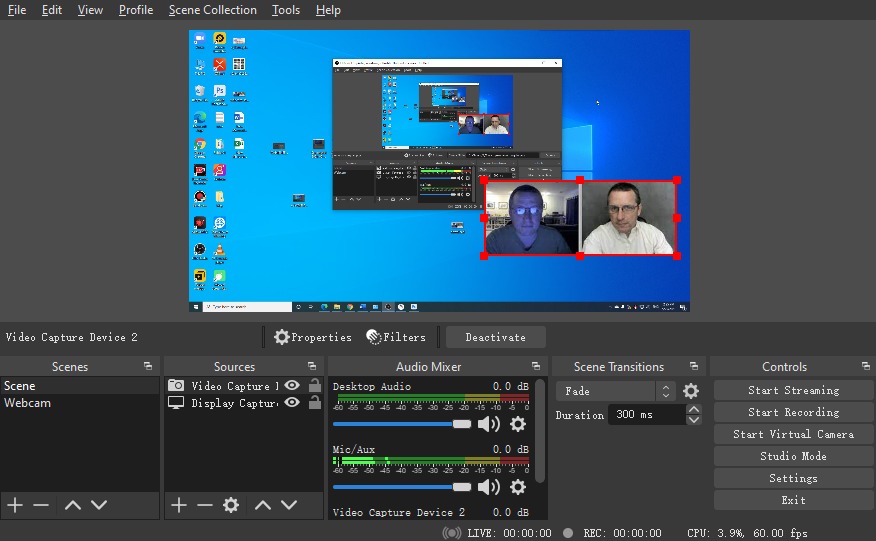
Step 4: Set up audio. Go to the "Audio" tab of the "Settings" window and select "Desktop Audio" to record the audio from the stream and select "Mic / Aux Audio" to include your commentary.
Step 5: In OBS, press "Start Recording", located in the bottom right. Then begin playing your live stream (or any other content you’re streaming).
Step 6: When the stream ends, click Stop Recording. The video is automatically saved to the folder specified in Settings > Output > Recording Path.
Step 7: If needed, open QuickTime, iMovie, or another video editor to trim, crop, or enhance your recording.
How to Record DRM-protected Streaming Video on Mac with CleverGet Recorder
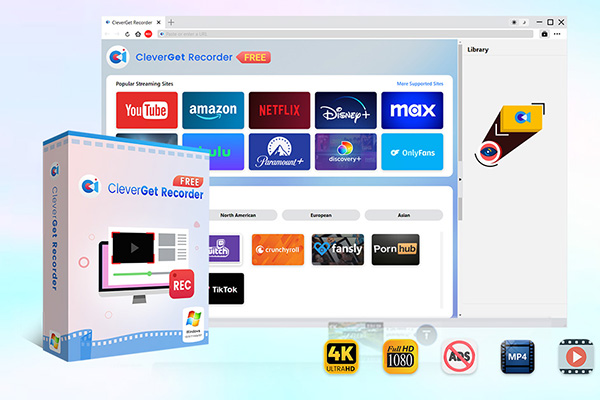
For streaming videos protected by DRM, standard Mac tools often fall short. You can use CleverGet Recorder, a free tool for easy capturing of both on-demand and live video from most online streaming platforms. Save videos as MP4 (or MKV) files without losing quality, even at 4K resolution & 60 fps. Perfect for capturing all types of movies and TV shows, live video, etc.
CleverGet Recorder will automatically detect when there is a video to capture. It will record the video smoothly. If the video contains ads, the ad filter will skip them, allowing you to watch video offline without unwanted ads. CleverGet Recorder records streaming content better than most built-in recording tools or standard type recorders, and is available for Mac.

-
- 100% free streaming video recorder.
- Record both online on-demand and live streaming videos.
- Record up to 4K 60 FPS video to MP4 or MKV.
- Schedule recording on preset recording length.
- Offer ad-skipping (beta) feature, and no watermark or time limit.
Here is how you can use CleverGet Recorder to record DRM-protected content on a Mac.
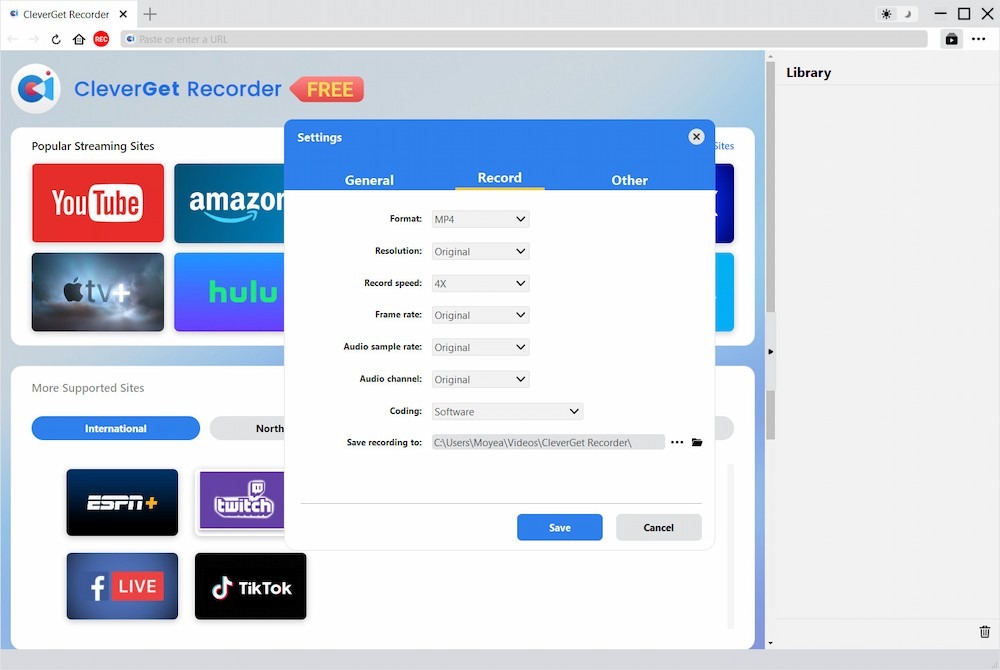
Step 1: Set Your Recording Preferences
After installing the application, open CleverGet Recorder and go to the settings. Here you need to choose what you want to record the video (filename format, resolution, frame rate, storage location, etc.)
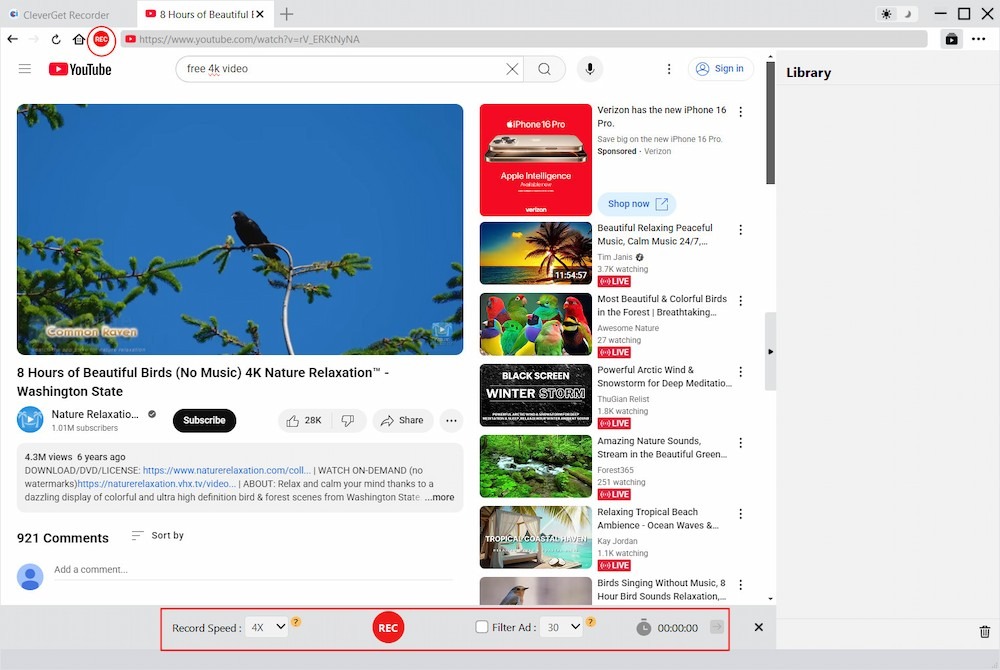
Step 2: Play the YouTube Video You Want to Record
Launch your browser and play the YouTube video you want to capture. Make sure it’s fully loaded in the quality you want to download in.
Step 3: Launch the Recording Toolbar
Next step is to locate and play the YouTube video you want to capture within your web browser. Make sure that the entire video has loaded before starting in order for you to save it in the desired quality.
Step 4: Start Recording
To record, simply click on the Record button of the CleverGet Recording Toolbar; CleverGet will then start to record the video you are watching. When the video is complete, you can click Stop, and your file will automatically be saved.
FAQs
Q1: Can I record any streaming video on a Mac for free?
Yes, if you’re using standard streams, you can record them for free using the macOS built-in Screenshot Toolbar or QuickTime Player to create quick and easy recordings. If you want to record any content that has Digital Rights Management (DRM) (e.g., Netflix, Hulu, or Amazon Prime Video), you’ll need to use CleverGet Recorder to do so.
Q2: Will recording reduce video quality?
If you are using the macOS built-in tools, there may be a very slight loss of quality when you record from the system audio; otherwise, there really shouldn’t be any noticeable loss of quality. Both OBS and CleverGet Recorder are capable of recording at high-quality resolutions (up to 4K and 60 FPS).
Q3: Is it legal to record streaming videos?
If you are recording for personal use, then it is generally okay. However, it’s illegal to distribute or share copyrighted content. Always check the platform’s terms of service.
Conclusion
If you choose the right method for your recording needs, recording videos from streaming sources on your Mac can be very easy and fun! For your average recording needs, the macOS Screenshot Toolbar and QuickTime Player do an excellent job. You could use OBS Studio to create nice, high-resolution, or long-length recordings; however, if you need to record content with DRM, you would use CleverGet Recorder. Ultimately, whether you’re capturing any videos for later enjoyment, you’ll never have to worry about quality loss when using your chosen tool.
-
How to Record Any Streaming Video on Mac Safely?Cassie/2026-03-30
-
How to Record Discord Audio on Windows, Mac & MobileCassie/2026-02-27
-

Instagram Viewer Guide: How to View Instagram AnonymouslyCassie/2026-01-30
-
Why Does YouTube Keep Pausing? Causes and Easy FixesCassie/2025-12-26
-
How to Record Facebook Live Stream for Free on PC?Cassie/2025-11-27
-
3 Best Methods to Play Blu-ray on VLCCassie/2025-10-30
-
3 Best Tools to Convert M3U8 to MP4 Without ErrorsCassie/2025-09-26
-
5 Best Methods to Open an ISO File EasilyCassie/2025-08-28
-
Discover 8 Video Platforms Like YouTube NowCassie/2025-08-13
-
Anonymous Mode: How to View Twitter Without an Account?Cassie/2025-05-26
-

4 Ways to Download Movies from FMoviesLeia/2024-05-30
-

Top 5 Disappointments of iOS 6 Apple Users GetTony/2012-09-27
-

6 Best URL to MP4 Converters to Download URL to MP4August/2023-09-11
-
23 iPhone 5 Rumors Listed from A to WTony/2012-09-13
-
2 Methods to Convert Flash EXE to Flash SWFTony/2012-08-28
-

Is Watchseries Safe to Use? What Are the Best Watchseries AlternativesPatrick/2024-11-01
-
10 Best Project Free TV Alternatives to Watch Movies/Shows OnlineMax Will/2025-04-29
-
How to Free Download iBOMMA Telugu Movies in HDMax Will/2025-04-29
-

Top 8 Free YouTube Proxy Sites for YouTube Unblocked 2024Lumi/2024-09-24
-
15 Best Z-Library Alternatives for Free eBooks in 2026Max Will/2025-04-29